Digital Modeling
In this project I am required to create a 3D model of a door by using Autodesk Maya 7 Autodesk Mudbox. At the end of this project, the 3D door will have to be a game-ready asset for rigging and production environment. This creation of 3D door involves digital modeling, UV mapping, digital sculpting and eventually rendering it out into an animation clip.
Cooking up the Design
I started my design by looking at different theme I can create for the doors, some that I find rather interesting are; medieval, gothic and surrealistic/ abstract style. After looking up references on the world wide web, I started my design and below is what I came up with in the end.

I intentionally avoided straight lines and proper shapes to try and give these designs a more artistic feel to it (which I slightly regret at crunch time). The 2nd design is very much influenced by Tim Burton style, slightly gothic, slightly crooked in structure and still retain a good simple composition, or at least that is what I was aiming for. I chose the 2nd design eventually, as it seems to be slightly more different than what a lot of people are going for.
Process
Below are screenshots of the modeling process done in Autodesk Maya

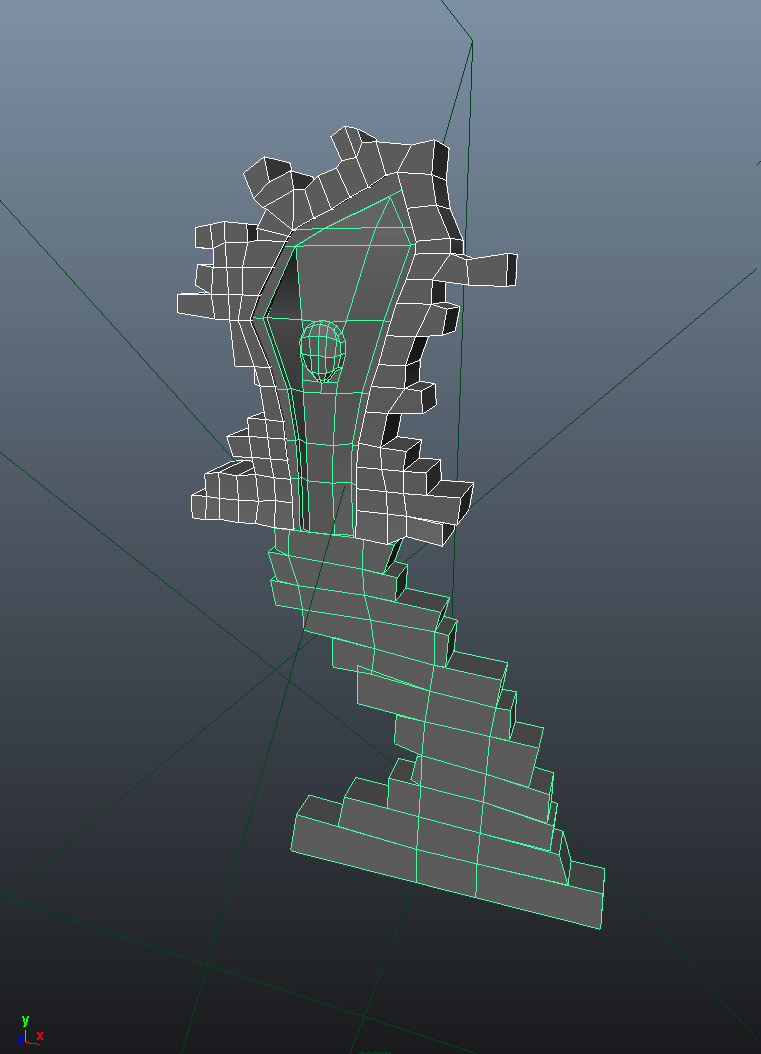
Started modeling the door and stairs from a single cube, following my sketch reference beginning with the frontal view and later on extruded the faces out from the side view.


Brick wall, lanterns and door handle follows soon after and the model is pretty much done.
Started UVing the model and realized that before I can take it to Mudbox, I have to fix the model so that it doesn’t have any extra vertex or faces that might hinder the process of subdivision level on Mudbox, this appears to be quite a challenge as at this point my model have lots of unwanted faces and parts that needed to be separated and fixed. I had so much trouble fixing this problem, I went back more than just a few times to fix the stairs and check back and forth between mudbox, I had to redo my stairs 3 times in the end to get it working on Mudbox properly.
After doing so, in Mudbox, parts by parts of the model is stenciled with my sketch and texture files, creating quite a nice texture on the 3D model, I have to say that this is the best part about the project in a long while to see the dead looking model suddenly came alive, although there isn’t any color yet, it is looking promising after all the setbacks I had.


Lastly this I have to extract the normal map from this model to create a bump map on Maya. The idea is to make the model looks real and textured while in reality it is a flat surfaced polygons, this allows the model to be used in any games with no problem such as being too big in file size and lag. However during this process I realized there were more problems with my UVing and I had to redo it all over again on Maya before I do the bump mapping, again this takes more than a while and deadline is literally few days away at this point. Its very tempting to change the design and make it simpler, but I personally hate to compromise my own design for my technical incompetence, so I decided to kill a few more brain cells and stick with the concept. Unfortunately, the extraction on Mudbox kept failing and bump mapping is unable to be applied on the model, so I have to resolve leaving the model as a normal UV map on Maya.
Below are screenshots of the model after being sculpted on Mudbox.


Lastly this I have to extract the normal map from this model to create a bump map on Maya. The idea is to make the model looks real and textured while in reality it is a flat surfaced polygons, this allows the model to be used in any games with no problem such as being too big in file size and lag. However during this process I realized there were more problems with my UVing and I had to redo it all over again on Maya before I do the bump mapping, again this takes more than a while and deadline is literally few days away at this point. Its very tempting to change the design and make it simpler, but I personally hate to compromise my own design for my technical incompetence, so I decided to kill a few more brain cells and stick with the concept. Unfortunately, the extraction on Mudbox kept failing and bump mapping is unable to be applied on the model, so I have to resolve leaving the model as a normal UV map on Maya.
Finalizing
I set a camera-aim to the model and animate it in a 180 degrees angle to show the necessary parts of the model, added an ambient light and made sure the rendering is in its highest setting. This model is then rendered to a .mov clip and below is the final look of my door design on Maya and when rendered out.


No comments:
Post a Comment